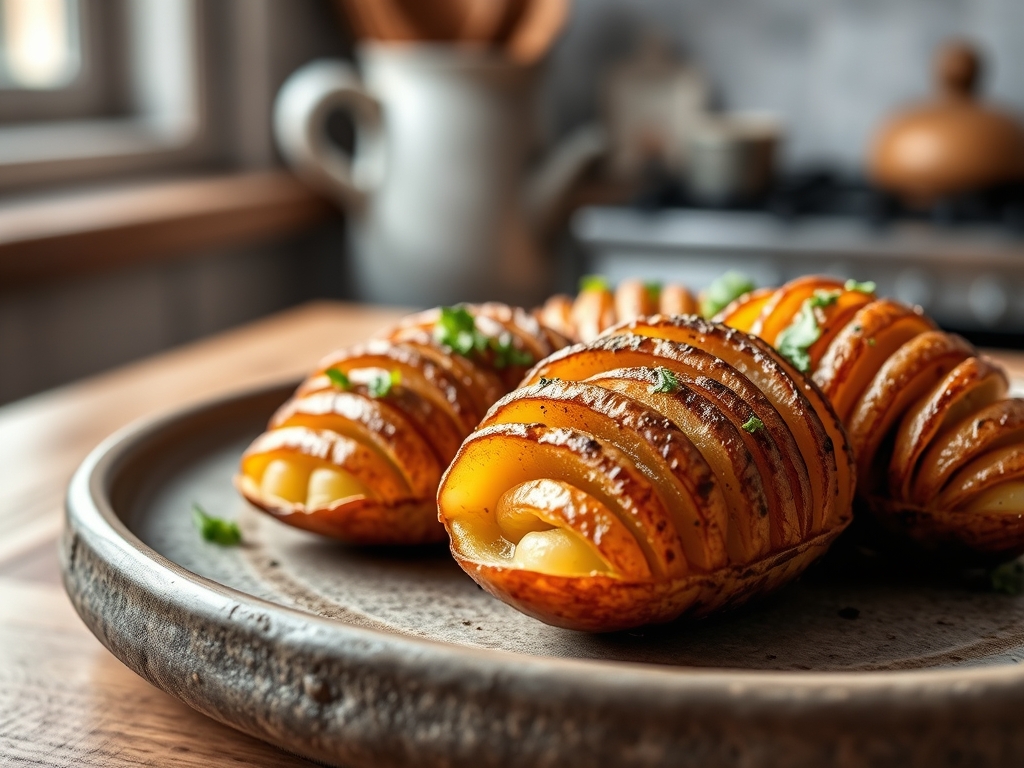
Imagine the audible snap of a golden potato ridge, followed immediately by a cloud of pillowy, buttery steam that smells like a Sunday afternoon. We are not just making dinner; we are engineering the ultimate texture profile. Mastering air fryer hasselback potato recipes is the secret handshake of modern home cooks who crave that specific intersection of a crispy French fry and a silky baked potato. While traditional oven methods often result in a soggy base or burnt tips, the high velocity air of the fryer creates a convection environment that mimics a professional rotisserie. This process forces heat into every accordion fold, ensuring that every millimeter of the tuber is seasoned and sealed. By the time you pull that basket out, you will have a sculptural masterpiece that looks like it belongs in a high end bistro but feels like pure comfort. We are going to dive deep into the chemistry of starch and the physics of airflow to ensure your next batch is nothing short of legendary.
The Gathers:
To achieve a superior result, your mise-en-place must be precise. Start with medium sized Yukon Gold potatoes; their high starch to sugar ratio ensures a creamy interior while maintaining structural integrity. You will need a high smoke point fat, such as clarified butter (ghee) or avocado oil, to facilitate the Maillard reaction without acrid scorching. For seasoning, gather flaky sea salt, freshly cracked tellicherry peppercorns, and a bouquet garni of rosemary and thyme. Use a microplane to zest a hint of lemon or grate hard parmesan for an umami finish.
Smart Substitutions:
If you are avoiding nightshades, large Japanese sweet potatoes offer a dense, viscous texture that holds the hasselback shape beautifully. For a dairy free version, use a high quality extra virgin olive oil infused with roasted garlic. If you want a piquant kick, swap the black pepper for Aleppo pepper flakes or a dusting of smoked paprika to add depth and a vibrant hue to the ridges.
The Clock: Chef's Flow
Efficiency in the kitchen is about managing the "dead time." Your total active prep time is roughly 12 minutes, while the air fryer does the heavy lifting for 25 to 30 minutes.
- The Prep (0-12 mins): Scrub, slice, and soak. This is where you use your bench scraper to clear the deck and your digital scale to ensure potatoes are uniform in size for even cooking.
- The First Blast (12-32 mins): The potatoes undergo initial dehydration and structural setting at 375 degrees Fahrenheit.
- The Glaze (32-35 mins): A mid cook application of aromatics ensures the herbs do not burn.
- The Finish (35-40 mins): A final high heat burst to achieve that glass like exterior.

The Masterclass:
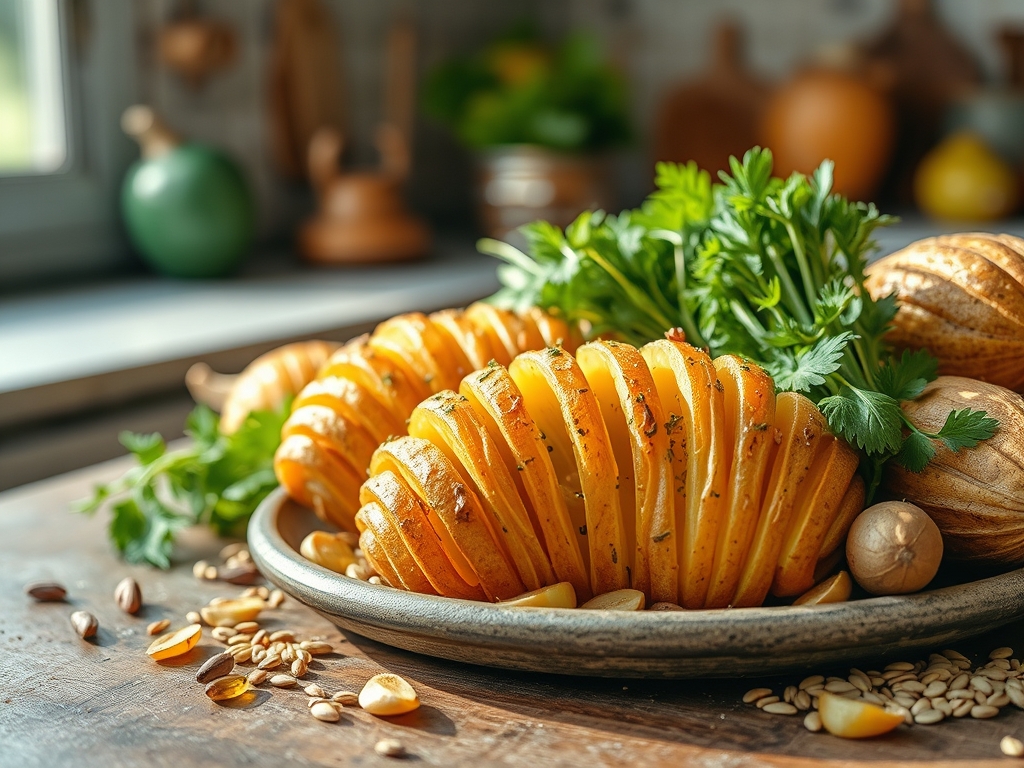
1. The Precision Cut
Place your potato between two wooden spoons or chopsticks. Using a sharp chef's knife, slice thin vertical slits about 1/8 inch apart. The spoons act as a physical "stop," preventing you from cutting all the way through the base.
Pro Tip: This technique maximizes the surface area exposed to the air. By increasing the surface area, you accelerate moisture evaporation, which is the prerequisite for a truly crispy exterior. Without this, the potato simply steams in its own skin.
2. The Cold Water Shock
Submerge your sliced potatoes in a bowl of ice cold water for at least 10 minutes. Agitate them gently to release excess surface starch.
Pro Tip: Rinsing away the free amylose (starch) prevents the slices from sticking together during the initial heating phase. This ensures the "fan" opens up, allowing the convection currents of the air fryer to penetrate the core.
3. Total Dehydration
Pat the potatoes bone dry with a lint free kitchen towel. Any residual surface moisture will turn into steam, which acts as a thermal barrier and prevents the oil from adhering properly.
Pro Tip: Water has a high latent heat of vaporization. If the potato is wet, the air fryer energy is wasted turning water into steam rather than triggering the Maillard reaction, which is the chemical dance between amino acids and reducing sugars that creates browning.
4. The Primary Fat Application
Use a pastry brush to coat every single crevice with your chosen fat. Do not just drizzle; you want a thin, even film of lipids on every slice.
Pro Tip: Fat acts as a heat transfer medium. Because air is a poor conductor of heat, the oil creates a thermal bridge between the hot air and the potato flesh, ensuring the interior cooks at the same rate as the exterior.
5. The Initial Roast
Place the potatoes in the air fryer basket, ensuring they are not touching. Airflow is your best friend here. Cook at 375 degrees Fahrenheit for 20 minutes.
Pro Tip: During this phase, the cell walls of the potato begin to break down. This is known as starch gelatinization, where the starch granules absorb internal moisture and swell, creating that fluffy, mashed potato like center we crave.
6. The Aromatic Infusion
In a small saucier, melt a bit more butter with minced garlic and herbs. After the first 20 minutes, use tongs to carefully remove the basket and brush this infused mixture over the fanned out slices.
Pro Tip: Adding garlic and delicate herbs halfway through prevents them from carbonizing. If you add them at the start, the high heat would turn the garlic bitter and the herbs to ash before the potato is even soft.
7. The Final Crisp
Increase the temperature to 400 degrees Fahrenheit for the final 5 to 7 minutes. Watch for the edges to turn a deep mahogany brown.
Pro Tip: This final blast utilizes thermal carryover. Even after you remove the potatoes, the internal temperature will continue to rise by a few degrees, finishing the "set" of the crust without overcooking the delicate center.
8. The Resting Period
Let the potatoes sit in the basket for 2 minutes before serving. This allows the internal pressures to equalize.
Pro Tip: Resting prevents the "soggy bottom" syndrome. It allows the viscous internal starches to firm up slightly, so the potato maintains its structural integrity when you transfer it to the plate.
The Deep Dive:
Macro Nutrition: One medium Yukon Gold potato provides roughly 150 calories, 4g of protein, and 3g of fiber. When prepared with 1 tablespoon of healthy fats, you are looking at a balanced carbohydrate source that is naturally gluten free.
Dietary Swaps:
- Vegan: Use melted coconut oil or a vegan butter substitute.
- Keto: While potatoes are high carb, you can apply this exact hasselback technique to large zucchini or radishes for a similar textural experience.
- GF: This recipe is naturally gluten free; just ensure your spices do not contain anti caking agents derived from grain.
The Fix-It:
- The "Accordion" Won't Open: If the slices stay stuck together, your starch rinse was too short. Use a knife to gently pry them apart halfway through cooking.
- Burnt Tips, Raw Center: Your potatoes were likely too large. Lower the temp to 350 and increase the time to allow the heat to reach the core without incinerating the edges.
- Soggy Base: You likely crowded the basket. Ensure at least an inch of space between each potato to allow for proper aeration.
Meal Prep: To reheat, avoid the microwave at all costs; it will turn your masterpiece into a sponge. Instead, pop them back into the air fryer at 360 degrees for 4 minutes. This flashes the surface fats and restores the "day one" crunch.
The Wrap-Up:
You are now equipped with the technical prowess to turn a humble root vegetable into a culinary event. By focusing on starch removal, fat distribution, and temperature control, you have transcended basic cooking and entered the realm of food science. These air fryer hasselback potato recipes are more than just a side dish; they are a testament to how a few smart tweaks can yield professional results. Now, grab your tongs, fire up that fryer, and prepare to be the hero of your kitchen.
The Kitchen Table:
Why are my potatoes still hard in the middle?
This usually happens if the potato is too large or the temperature is too high. The outside cooks before the heat can reach the center. Try using medium potatoes and ensuring you slice at least two thirds of the way through.
Can I use Russet potatoes instead of Yukon Gold?
Yes, but Russets are more "mealy." They will be extra fluffy inside but can become fragile and break apart. Yukon Golds are waxy and hold the hasselback shape much better during the flipping process.
Do I really need to soak them in water?
Absolutely. Soaking removes surface starch that causes slices to glue together. If they stick, the air cannot circulate, and you will end up with a solid block of potato instead of crispy ridges.
What is the best oil for air frying potatoes?
Use an oil with a high smoke point like avocado oil or ghee. Avoid extra virgin olive oil for the high heat stage as it can smoke and develop an "off" flavor at 400 degrees.
How do I make them extra garlicky?
Rub the potato with a cut garlic clove before slicing, then use garlic infused oil for the first roast. Add fresh minced garlic only in the last 5 minutes to prevent it from burning and becoming bitter.